Treasure Hunting for Kids

Being engaged with your children is very important, and with the short summers we get in Edmonton, making the most of those few precious days of sunshine can mean a summer well-spent. One activity my family has recently become involved with is ‘geocaching.’

You might have heard the term before. If not (like me a couple weeks ago), let me catch you up! You can think of geocaching as a sort of ‘treasure hunt,’ except instead of an old, wrinkly map (which is also fun!), you’re given GPS coordinates!

For the avid adult geocachers, sometimes these treasures or ‘caches’ are extremely hard to find. They can be located in remote areas that require days of hiking and, because they’re well out of service areas, a professional grade satellite GPS unit. This hardly seems like the kind of adventure to undertake with little ones, right? Luckily, there are plenty of kid-friendly hunts in and around the city, often in our own glorious river valley, which we are so fortunate to have! For these types of hunts, your smartphone, some sunscreen, a few snacks, and water bottles are all you need!

How to Find Your Cache

In order to complete geocaching with your kids, you need to have a smartphone and download the geocaching app. The app will allow you to follow the trail to your next cache and even track the caches that you find! And there are so many for the Edmonton area! You’ll never be at a loss for weekend treasure hunts!

Go here to get the app.

Like I said, you won’t need a pen and notepad because the app tracks it for you but I found my kids preferred the old-fashioned method anyway so we brought them with us!

After you have the app, check the difficulty level of the hunt. For little ones on a hot day, I would try a larger sized hunt with lots of caches. This is because it will be easier to find them and you can quit at any time with just an easy “Okay guys, last treasure!”

It’s easier to pull them away if you’ve already found a number of caches!

When you find your cache, you can check it off on your phone or on your handy notepad!

Making Your Own Cache

Once your kids have had the pleasure of finding a few caches, maybe your family can even make their own! Choose a small trinket from around your house and let your child choose a public spot to hide it. I recommend also placing the item in a waterproof container to prevent it from damage. Then hide it in your secret spot!

If your cache is going to show up for other users, you’ll have to use the app to add it to an existing geocache. Go to your secret location and the app will prompt you to go through the steps of adding it. My kids liked this part because we could watch how many people came by to find our cache!

Old Fashioned Treasure Hunt

Now, remember that old, wrinkly map I mentioned? If you want your kids to have the same old fashioned experience as you (or maybe Grandpa) had, perhaps you’ll find the time to make your own hunt!

Gather a bunch of your children’s toys (maybe not their favourites) and hide them around your yard or out in your favourite park. As mentioned, try to use waterproof items so they can return safely home. Then make a map! Or maybe two or three…

My kids are great sharers but even the best sharers can get a little excited and rip a piece of paper. I would even make an original for me if I’ve done a big hunt and can’t remember where I’ve left stuff. You can even make it look like an authentic map by pouring cold tea (or coffee) over it and leaving it overnight to dry. My parents also used to rip or roll the edges to give it that heavily used look.

Another tip for your homemade map is to put everything in picture form. This will help even the littlest hunter have a chance to find that treasure!

Lastly, roll up the map and tie it with a bit of string to provide that pirate look we’re going for. Voila!

Treasure Hunter Precautions

If your kids are anything like mine, nothing gets them more excited than the idea of seeking out hidden treasure. While most of the geocaches are simply books for those to sign, some include little trading items (often just gently used toys that other kids have grown out of) which work on a ‘take-one, leave‑one’ system.

With COVID cases on a slight rise again, I don’t let me kids touch any of the objects but that doesn’t matter to them! Finding the treasure and marking it down on their little notepads is all the fun they’ll ever need!

Other precautions are taken to beat the heat. Make sure to lather everyone up with your favourite sunscreen and bring plenty of water. My go-to for sunscreen comes in a spray-on can for ease of application. My kids don’t seem to ever stand still for long so this helps a lot! Find it here. As for our favourite water bottles, these ones from David’s Tea are the best I’ve ever used! They are like a regular water bottle, which helps keep them clean because there is no straw! Also, the bottom comes off! This allows me to add ice cubes to the mix and allows for an even more effective clean! Find them here!

Let the Adventure Begin!

I hope you have a great time outdoors with your family this season! Even with all of the changes we are currently going through, perhaps this little outdoor adventure gives your family an excuse to enjoy the sunshine!

Child Photography

Children are always so photographic, with their dimply smiles, wild hair, and endless playfulness. I’ve always wanted to cover my walls in photographs of my children – what parent doesn’t! And with the numerous social media platforms enabling us to share pictures with others, it’s nice to be able to send the best pictures of my kids to my family. However, even with the easy access to photographic children and shareable media, it’s still difficult because children never seem to stop moving!

Nonetheless, over the last couple of years, I’ve met some moms who’ve given me some pro tips on being a successful amateur child photographer. I’ve used quite a few of these different tactics and have found that some work very well at catching that perfect emotional or adventurous portrait. So, I’ve compiled them here for you too, in the hopes that you get what you desire – the perfect picture of your family!

Cameras for Candids

Before getting started, be sure to be familiar with the camera and scenery that you are using. Cameras range in both price and practicality. The camera on a smartphone is a great choice if not looking to invest in something bigger but it has a few limitations when taking shots of moving or shadowy targets. Compact cameras are great for busy families and can be purchased on a budget. I’ve always liked simple cameras that aren’t too difficult to use as whipping it out fast is imperative for those once-in-a-lifetime shots. But the bigger and more functional cameras can also allow you to get stunning candids that can be blown up for a big wall canvas. You can find more on camera types here.

Personally, I use a Nikon D5300 as it was given to me as a gift. This camera generally runs around $500 so it’s actually on the cheaper side of the spectrum. It’s given me some astounding photos of my children though and has been simple to use and adjust for my needs. I believe as long as you are familiar with your camera, it should do you well!

Portrait Particulars

As for scenery, lighting is your object of manipulation. For the best and brightest photos, I always take pictures outside on cloudless days. This provides the best backdrop and lighting to highlight my children’s activities. Almost every photograph is wall worthy if taken outside I’ve found. However, not all memories are made in the wonderful outdoors. Some of my best captured images were taken indoors with bright lighting, natural light, or mirrors.

Natural light and artificial light tend to mix unwell, giving harsh undertones or strange shadows to a picture. I try to choose one or the other when trying to get the perfect shot. Natural light that comes through your windows is soft and mood captivating. Artificial light, when it’s bright and everywhere, can produce outstanding photos (ever wonder why the best selfies are shot in bathrooms)? Mirrors can also provide more light to a shot, if your child will look into one long enough!

The Uncooperative Child

Now that we’ve covered the minor basics (the easy part), let’s look at how to capture candids of those moving targets! Not every kid wants to have their own personal parental paparazzi, so catching them in the zone can be a little tricky. Here are those pro tips from the moms I’ve met with some photographing experience!

  1. Embrace Their Desires

To get your desired picture, you’ve got to give a little! What do your children love to do most in the world? Is it dressing up as a superhero? Jumping wildly into a pile of leaves? Cuddling on the couch with their favourite stuffed animal? Let them do it while you snap away to get that perfect portrait! Letting them do exactly what they want will put the biggest smile on their face and will also help you capture the memory of their favourite pastime. A win-win!

  1. Play a Game

This little trick of misdirection can work wonders on tantrums, chores, and even photography! Invent a game to get your child to do the image you’re trying to capture. If you want a running shot, throw a soccer ball. If you want a goofy shot, play Simon-says with them. If you must have a messy shot, help them finger-paint a picture. Make a game out of the picture and watch them get creative!

  1. Time Your Work

Your child or children do have a schedule to keep. It may not be as diligent as yours, or as precise, but it does make a huge difference in their lives if the schedule is disrupted. You will never get the goofy shots when your child is tired, or the cuddly shots when your child is playful. Work to the schedule you’ve built for them already and you will have tons more luck nabbing that perfect candid!

  1. Let Them be the Photographer

Every child is curious, always wanting to see or do what their parent is doing. Give them a chance behind the lens if they should give this indication. It could help quench their thirst for knowledge a smidge and also give you an opportunity to get a selfie! My children have had so many opportunities to take photos now that they happily let me snap away and then come see the photos afterwards!

Kinds of Candids

There are many different kinds of photography – landscape, architectural, sports, wildlife, aerial, etc.

But when it comes to my kids, I’ve landed on a few that make my heart melt to look at. I’ve listed them as well, and my tips on how to capture them for your wall!

  1. Action Shots

I love taking photos of my kids when they are in the middle of playing particularly active games. To do this without getting a blurry photo, I had to try a few different things. One, I learned the best action shots are taken outside. If taken inside, I had to really brighten my home! Next, I had to focus the camera’s centre on my child. This meant I would not be able to get a photo of them running past me, but more a photo of them running at me. Last, I had to increase my camera’s shutter speed and turn on the continuous shooting mode. These functions are typically on every camera other than phone cameras. If you are using a phone camera, the other tip you can try is to shoot often. This is not an ideal solution but sometimes you will catch that one-in-a-million shot!

  1. Silhouette Shots

Another type of fun shot that can be produced by manipulating lighting is the silhouette shot. I find silhouette shots (or black and white photos) make the best dramatic pictures. Many moms-to-be or new moms get these dramatic shots taken of them, and they make lovely, soft, emotional photos. Other silhouette shots that are hilarious (and super contrasting to the softer photos) are the imaginary play shots. I think the best ones are when children dress up in their favourite costumes and act out their wildest imaginary stories. These are likely the most fun indoor shots for toddlers and preschoolers too!  Turn out the lights, and let the natural lights from the windows make shadows of your kids on the walls. Try to capture both your child and their shadow in the shot. They will love to make more for you once they see what you’re trying to achieve!

  1. Sensitive Shots

I have found that these photos are the easiest ones to take as they only seem to require dramatic lighting and cuddly child. To get the best results, I like to use dark backgrounds for black and white photos (coupled with dark clothing colours and your child’s face will really stand out). If you want a colourful sensitive photo, I also like to shoot with the sun behind my child. It makes for a pretty neat silhouette portrait that’s soft and dreamy in nature.

  1. Portraits

Portraits are easy to take if your child is unnaturally cooperative! They often require a steady hand and a large pile of chocolate for bribery purposes. I find any camera is able to handle these shots too, especially if taken one of two ways: have your child look up at you while you take the picture (vertical shot) or use a mirror for horizontal shots. The vertical shot, when you’re standing and looking down at your child, emphasizes your child’s eyes. Children naturally have large heads and their eyes tend to pop when looking up. These photos make heart-melting portraits. The horizontal shot, just a simple head-on photo, is easiest to take in a mirror I find. You take the photo of the mirror while your child looks into it. This prop helps scatter light all over your child’s face while giving them something to focus on.

  1. Scenery Shots

These shots are also particularly easy to take but require good lighting and a pleasant backdrop, such as the golden hour and the glorious outdoors. These shots focus less on individuals and more on the group, perfect for family action shots! Get the gang together for their favourite pastime and snap away! Shoot away from the sun during the golden hour. The golden hour is the hour after sunrise or the hour before sunset. This time period makes soft, warm pictures. To get more vibrant pictures, I take pictures in the middle of the day and then play with the camera effects to enhance the colours. It helps to focus on one colour, like the background, to do this. Use elevation to your advantage, like being at the bottom of a hill and looking up at everyone to catch the blue sky, or vice versa, to catch the green grass.

Snappy Happy

Well there you have it! Please feel free to use any of these tips to get that perfect picture of the child or family! Also, please don’t forget that I’m still learning the ins and outs of the child photography world and any tips for me are greatly appreciated! Leave your comment for the KARA family or just for me! All are welcome and happy photographing!

Holidays in Edmonton

Now that the holiday season is well under way in Edmonton, I thought I’d share some ideas for family fun around the city. There are plenty of activities for little ones and grownups alike! I’ve included family entertainment from far and wide, as well as free activities you can choose closer to home. I like to think there’s a little bit of holiday spirit in each! I know my family and I have been looking forward to some of these all year long!

December 6 to December 29 – Festival of Lights

Prepare yourselves for an extraordinary light show this season with Zoominescence’s Festival of Lights at the Edmonton Valley Zoo! Artistic light installations within the unique setting of the Valley Zoo are sure to bring out the child in everyone who gets a glimpse! You’ll be so pleasantly surprised and spirited by the skating rink, maze, fire dancers, ice, light exhibits and 11 artist installations that you won’t be able to tear your eyes away! Enjoy this family event Fridays, Saturdays, or Sundays from December 6 to 29, from 5 to 9 pm nightly! At only $8.50 for adults and $6 for children, it will be a dazzling deal and an event they’ll be talking about all winter long! My family and I can’t wait for this one! Check out more details here.

Saturday, December 14 – Old Fashioned Hay Rides

Did you miss your chance to see Santa in Old Strathcona? Have no fear! You’ll still be able to meet him and tell him how good you’ve been all year at the Marketplace at Callingwood! And this time, from 11 am to 3 pm on December 14, get your chance to enjoy a free horse-drawn wagon ride for the whole family! The Marketplace at Callingwood is a summer farmer’s market that will be reopening for this one-day special event in honour of Santa, so they ask you bring a non-perishable food donation to be kind to others as well! Check out more details here.

December Weekends – Numerous Holiday Adventures

If you wish to expand the holiday adventure, you should check out more hayrides, cookie decorating, holiday stories, petting zoo, choir carols, holiday crafts, and unique shopping at Heritage Park! It will be open Saturdays & Sundays, November 23 to December 22 from 9:30 am to 4 pm. Ticket prices range from $5.75 to $11, depending on the ages of attendees. I’ve visited Heritage Park with KARA a few times during the summer months and know how beautiful it is, so it’s sure to be even more glorious when glittering with snow! Check it out here.

Month of December – Festive Window Contest

I’ve always dreamed of a fun date night downtown on Christmas Eve like you see in the movies. And now’s my chance! Nearly 30 shops from 95 street to 111 street and 97 avenue to 105 avenue have dressed up their windows with lights, décor, trees, and candles to celebrate the season! I’ll be sure to put this date night idea on my wish list! Find out more here.

December through January – Enchanted Forests

I’ve recently learned there are a few elegantly decorated forests within Edmonton and surrounding communities that families can go see at no cost. A few sponsors have graciously decorated a few spots to highlight the holidays, check them out:

  • Dow Centennial Centre – 8700 84 Street
  • Shell Theatre – 8700 84 Street
  • City Hall – 10005 102 Street
  • Fort Saskatchewan Public Library – 10011 102 Street

I do believe my friends and family will get a kick out of touring them this season! Learn more here.

All Season Long – Tobogganing

Certainly one of the best holiday past-times and my family’s favourite holiday activity; tobogganing! The City of Edmonton has created a list of what I believe are the best and safest tobogganing hills in the Edmonton area. They’ve also done their best to give families tips on how to make tobaggning as safe as possible. Enjoy this activity with your loved ones all winter long, as it’s one of the best ways to spend a cool, sunny day! Find the best hills here.

Continuing through the Winter – Ice Castles

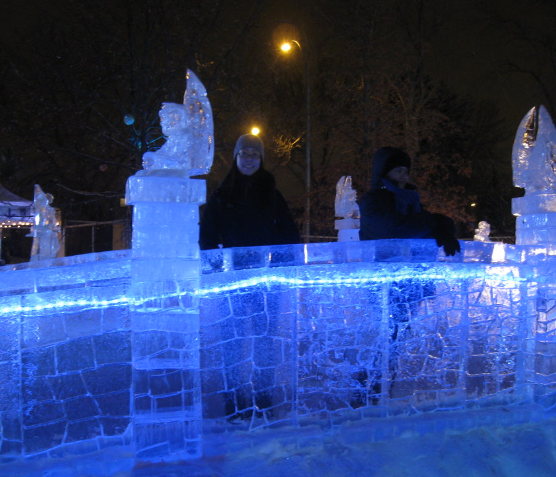
The ultimate winter wonderland, the ice castles of Hawrelak Park, is certainly one of the most astonishing activities on our family holiday list of things to do this season. I know my boys won’t recall the last time we visited these extraordinary sights but I’m sure they will this year! Additionally, if your child (or you) is a fan of the Narnia Chronicles, I believe this will be the inspiration of the castles this year! I hope you and your family get to enjoy them too! Presale tickets are roughly $15 and children 3 and under are free! Check out the details here.

That’s All Folks!

Well, I hope my family’s list of holiday activities has given yours some ideas for the upcoming season! As always, please share your adventures with me and ideas with the KARA family! We would love to find more holiday escapades and enjoy the season together!

Loose Parts Play

Have you ever heard of loose parts play? When I first heard about it, it sounded like a cross between messy play and outdoor learning, and it is! With a whole lot more…

The History

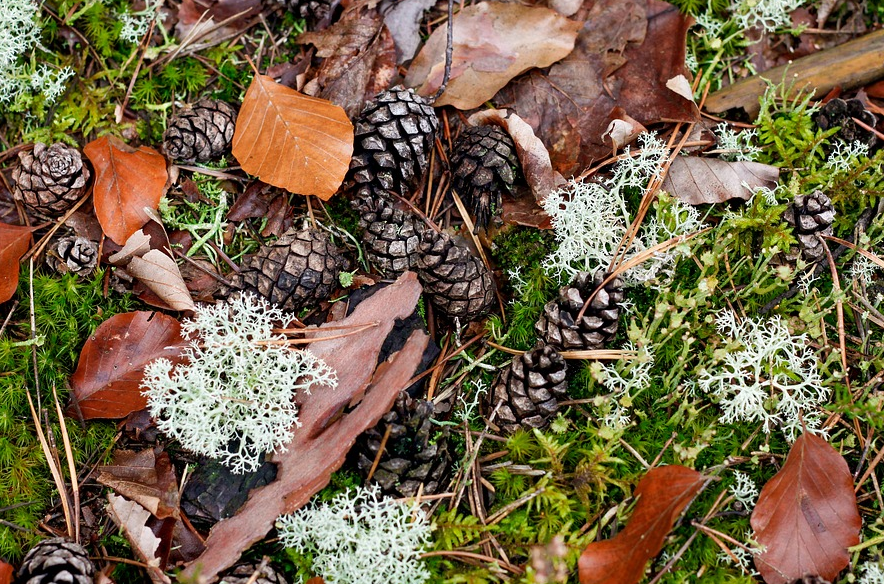
The theory of loose parts play was first proposed by an architect in the 1970s. It has since been the inspiration for many physical education teachers and play space designers! In a one sentence answer, loose parts play is a form of play that incorporates moving parts to allow children to move around their environment in a natural way and empower their creativity (click here). The loose parts can be natural or synthetic, for instance, both sticks and pinecones, as well as spoons and boxes, can be used as objects in loose parts play. The best objects for loose parts play, I’m sure is no surprise to parents, are objects that can be molded or adapted, taken apart and put back together, and irregularly shaped.

The P.E. Class

Physical education teachers use loose parts play to encourage children to be more active in everyday life, not just in the gymnasium! By bringing imagination into the classroom (or open outdoor space), children move away from organized sports and competition and towards natural, everyday movements, such as carrying, lifting, bending, turning, and fine motor skills. Along with the movement comes the inspiration to be creative and well-rounded social skills! By encouraged to use objects as they so choose, children can create a wider variety of play exercises than those that are purely adult led activities. The loose parts that can be moved, carried, redesigned, lined up, and taken apart help foster problem-solving and innovation skills required in later life. In other words, it helps them think outside the box! As for amazing social skills, teachers have noticed that rather than teaming up with their friends like they do while playing sports, children start to play together and interact based on shared interests! Collaboration at its finest! Click here!

The Play Spaces

Play designers utilizing this theory have started developing play spaces that are no longer a one size fits all kind of notion. By moving away from expensive play equipment that are one-type uses, they’ve started having loose items for children to manipulate as they please. It is most obvious in newer childcare centres, recreation centres, or preschools, where children have the opportunity to gather outdoor items, like rocks and paint them, or play kitchens with all the mini accessories (click here). I myself take my children to Millennium Place in Sherwood Park, where they have a large room dedicated to camping toys. Children are encouraged to build toy fires out of wood and cook over the stove.

The Con

So is there a downside to loose parts play? I myself have only noticed one – the clean-up! Just like messy play, with its many advantages and brain-developing powers, loose parts play can be a bit of a chore at the end. Personally, I like loose parts play outdoors so my children and I get the added benefits of sunshine and fresh air, and the clean-up is practically non-existent. However, in the winter months, I also preferred having boxes of sticks, pinecones, rocks, and dried flowers over the synthetic loose parts. My reasoning was I just had to scoop them all back into the box and do a quick sweep to get the debris. If using synthetic loose parts, it often meant washing my dishes after they’d been dragged across the floor a bunch. Plus it’s nice to have summer stuff to remind you winter doesn’t last forever!

The How To

Only two steps are required for loose parts play, gathering the materials and playing with your child! To engage your child in loose parts play, be sure to choose items that have no set purpose. If you give your child his toothbrush to play with, it’s likely that he won’t be as adventurous with it as he would something that doesn’t appear to have a defined use. Great choices that have worked for my children are:

Pinecones

Flowers

Seed pods

Nut shells

Leaves

Sticks

Rope

Baskets

Buckets

Sand

Shovels

Gravel or rocks

Larger stones

Old bird’s nests

Water

All of these items and more can be used for loose parts play, just let them roll with their imagination! However, be sure to choose items that are developmentally appropriate for your child (small objects aren’t recommended for littler ones).

Next, support your child when they make a change to the shape or object that they are pursuing. If they started out making a castle but it looks more like a sinkhole, let them adapt to their wishes. Resisting the urge to “fix” the project can be difficult for the more practiced creative types, but try to let your child follow their desires. For me, this can sometimes mean intervening when older or younger brothers try to “help.” I usually resolve the situation by saying “Oh, I love sinkholes! They are my favourite!” and both boys usually get a look of ambition and confidence when I compliment their work. It also helps the other brother understand that any project is worth admiring.

The Upkeep

Lastly, in order to keep loose parts play a success in your child’s play repertoire, be sure to keep them accessible for everyday use and keep the materials properly replenished and added to. My children don’t choose to play with their loose parts bucket everyday (thank goodness) but it is important that they always have the opportunity to! I also like to restock with different items that we find on outdoor walks to the park! This keeps items new and exciting for my boys, especially when they found the item themselves!

In Closing

Loose parts theory is best enjoyed with others in a fluid environment! Children gain more skills and confidence in fluid environments rather than static ones. Try loose parts play with your child and watch as their creativity, imagination, and self-assurance develop! As always, happy playing!

Bicycling Basics

Even in the dreary weather we’ve been having, I’m sure many of you are excited to start your little ones off on a new adventure – BICYCLING! Teaching a small child can be a fun, rewarding, and albeit, tricky experience. Also, don’t forget nerve-wracking!

First off, I want to point out a great resource I came across three years ago and still use today! It’s the best guide to correctly sizing your child, narrowing down your bike options, bicycle reviews and much, much more – Two Wheeling Tots (click here). I’ve used this website for all my bicycle information needs as they complete hundreds of reviews and give you all the safety info needed to start your child’s two wheeling adventures. The only thing I caution is their bike buying options though, as they are based in the US and product availability isn’t as great here in Canada. Otherwise, they are phenomenal and I mention them quite a bit throughout!

First Steps – Exploration and Understanding

First off, know that bicycling can be a challenging and even daunting task for children. They almost all want to do it, so they can be like the “cool, big kids,” but when faced with the actual task, it can be a little scary to move from two stable feet to two rolling wheels. So encouragement and patience are key.

At around 18 months, I let my kids explore bikes and the way they move while they were lying on the ground. Also, it helps to point out bicyclists just in your normal, everyday activities or in your child’s books. Let children become familiar with bicycles before getting them on one.

Before getting my son his first bike, I would point and OOO and AHH every time I saw a bike while we were walking , to reinforce a positive interaction and curiosity with them. I started this when he was a year so he would learn the words and become familiar with seeing bikes in a positive light. I was very careful to only draw attention to cyclists who were wearing helmets and other proper safety gear. I didn’t mention them and would pass them by silently if they weren’t wearing helmets, hoping my son was just looking the other way! I’m sure this helped reinforce the normality of helmets and how even adults wear them.

Next Steps – Measuring and Picking Out the Right Bike

While it’s fun to choose the colours and designs of the new bike, it’s more important to pick one that is a proper fit for your child. Bicycles come in all shapes and sizes, but the very best way to get the right bike is by measuring the inseam of your child’s pants and making sure the seat height of the bike is the same distance to the ground.

My son was a fairly squirmy toddler and so I picked his best fitting pair of pants, laid them down flat on the floor, and did my measurements in the relative peace of my own living room. I really caution parents not to do the measuring in the middle of the bike store because your child may be so overwhelmed and excited (or terrified) that you’re not likely to get the most accurate measurement (click here).

Use the measurement to narrow down which bikes will fit your child. You can do either balance bikes or a bicycle with training wheels.

Balance Bikes

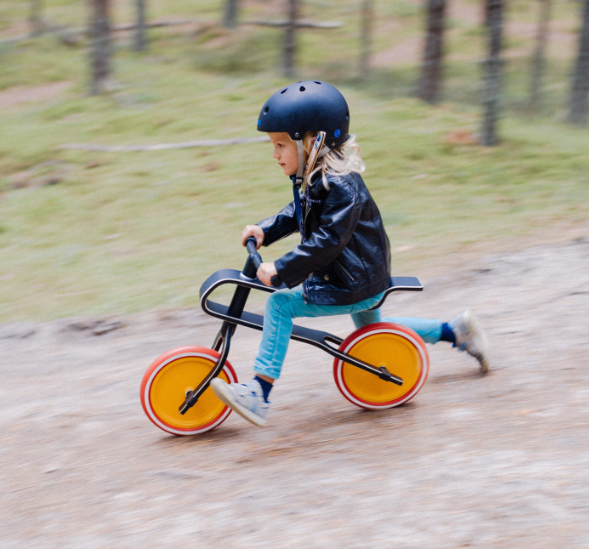
Balance bikes all the rage now! They are bikes without pedals, training wheels, or any other do-dads. This makes them incredibly light, enabling an 18 month old to pick them up and move them with ease. They also fit children better, as they are designed more like adult bikes without the added accessories. And they help kids learn to balance on two wheels, which is the most challenging part of riding a bike. Some of them do come with handbrakes and you can add bells and streamers if needed!  The prices range quite a bit but the Nakamura 12 in bike is sold at Sportchek for $80.

For our two boys, we tried the new balance bike wave. While balance bikes may seem odd (they certainly did to me the first time I encountered one in the wild), the idea grew on us, and our children. They were light enough for my son to carry around and maneuver, they were comfortable for him to sit on, and they teach a child to balance! Huge bonus and extra points – when my son grew too tired to keep riding, the bike fit easily in the bicycle trailer used on the back of my bike. The bonus for my child, well he also gets to look like those cool older kids, without all the pressure! Click here.

Training Wheels

Bicycles with training wheels have been around for ages, and if you are sentimental, needing that exhilarating memory of letting go of your child’s bike as they take off for their first ride without their trainers on, then this is the bike for your family! These bikes would also be a great fit for those children needing a little extra encouragement as they have a sense of stability you won’t get with a balance bike. It’s harder for children to turn the bikes and move them because of their extra gear and weight. Bells, streamers, and spiderman stickers can be added to these bikes too!

Helmets

Before we go any further, always stress the importance of wearing a helmet! Never let your child on a bike without this crucial piece of safety gear! To get the right fit, measure your child’s head with a soft measuring tape one inch above his or her eyebrows (the thickest part of the head). A proper fitting helmet should fit squarely on the head, not tilted back or forward, and should not move when he or she shakes her head. Ask your child if they want broccoli for lunch to try this safety test! Click here.

A nice little tidbit – I also stole the chance to reiterate road safety and rules about walking hand in hand when crossing a road while forcing the helmet convo on my child! It worked great!

Other Accessories

Balance Buddy – For small racers who want to keep up with others but haven’t got the feel for balance quite yet, try a balance buddy! They are a long handle to attach to your child’s back axle. They ride, you balance. It can give them a bit of a confidence boost and some exercise for you! One $30 at Canadian Tire!

The Clicker – One interesting thing that many bike manufacturers have noticed is that hesitant riders are often incentivized to keep moving forward if they hear a ‘click, click, click’ sound from their back wheel. It prompts them to keep going to keep hearing the sound. Easy and cheap, just duct tape a card to your child’s rear wheel.

Strap – Some of the best balance bikes come with bags or straps to shoulder carry after your child ditches it to chase a butterfly. I myself bought our balance bike off of Kijiji and it didn’t come with a strap. Luckily, I found a very short bungee cord that worked perfectly as either a shoulder strap or to secure the bike into the stroller, wagon, etc. Worked like a dream!

And Off We Go!

It’s very exciting to bring all the gear home and encourage your child to hop on. But I caution all parents to be patient. Our oldest took almost two years of bumping into walls and falling down on his balance bike before things really happened. And some days he just did not want to practice. But it did eventually happen! Once your child finds his or her comfort zone, the feet come up and the magic begins!

One summer day last year, walking down a paved walking path, laden with a baby and a diaper bag, my oldest son got the feel for it all at once. He pulled his feet up while going down a hill, screaming, “I’m going to win the race!”

I dropped my bag (kept the baby) and took off after him! He was having the time of his little life! I was too, for the most part… Haha!

And now he is a natural! He is ready for his first bike with pedals (no trainers needed) and is doing just fine mastering his “death-defying maneuvers.” And a big bonus – his little bro is all ready to start on his new hand-me-down balance bike (with a few brand new flame stickers to increase it’s speed).

Last Gentle Reminders

Always remember to remind your children of the dangers of riding their bicycle (preferably without terrifying them!). Our children are small and hard to spot, so keeping them away from roads is certainly a good idea until they’re old enough to understand the dangers and do’s-and-don’ts of bicycle safety. And never forget your helmets!

It’s also extremely important for parents to have patience and understanding in this important step of their child’s development. Try to never discourage your child or pressure them to go too far outside of their comfort zone. While some gentle encouragement (“You can do it, just give it a try”), can be hugely beneficial, going too far (“Well, I can’t teach you if you’re not willing to try”) can have some pretty negative effects. Remember that with all things, learning to ride a bike takes time and everyone learns at a different pace.

At the beginning of our adventure, my husband and I were the gentle guides, but two years later and our child takes the lead, often winning the race!

Back with Summertime Tips

It’s Wednesday, May 29, 2019, at precisely 6:00 pm. It also happens to be 32 degrees Celsius outside. It appears that summer is, at long last, officially upon us!

While this is exciting, it begs the question: how am I going to occupy my children with fun, safe, affordable outdoor activities?

The first activities that come to mind for me are KARA summertime programs. These are free, drop-in programs running from the start of July to the end of August. They are largely spent outdoors and follow weekly themes and adventurous outings around the city. Until these programs start up though, you can usually find my family at Drop-In Fun, Creative Play & More, and Playtime Drop-In. These programs are also a blast – the ladies and gentlemen running the drop-in programs put in a lot of effort to make family time fun and educational! Connie’s cooking is also worthy of the long trek it takes to get there!

For those who are as familiar with KARA’s wonderful resources as I am, here’s a bit more about our great city:

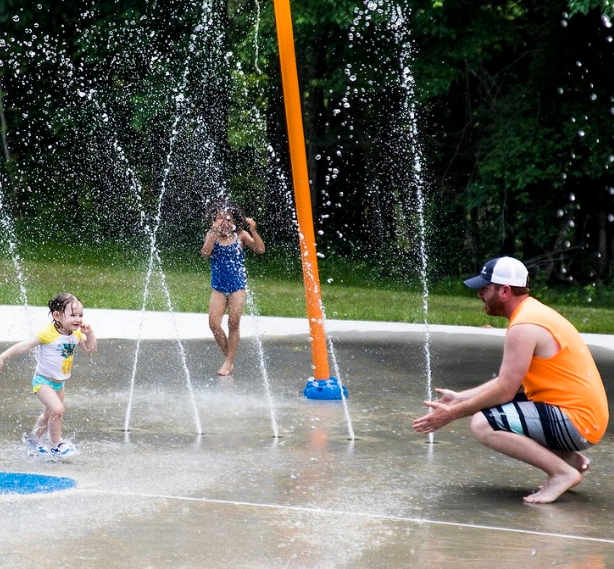
Edmonton is home to 70 completely free to access spray/water play parks! These are typically my go-to and they are easy to find close to any home. They always provide a way for my family to cool off on hot days as well! Some of these sites are still under construction, but to find one near you and see their availability and hours, visit the City of Edmonton’s website here.

Another fun water activity (my kids LOVE the water) is Edmonton’s several outdoor pools. Edmonton has announced that, for the third year in a row, all of its outdoor swimming pools will be open to the public with no cost of admission! If you happen to live near KARA, the Borden Natural Swimming Pool is where you will want to be this summer! It is the first of its kind in Canada – a man-made natural pool surrounded by sand and disinfected without chemicals! This pool is set to open June 22 – just in time for the really hot weather! For more information on the Borden Natural Swimming Pool, including hours of operation, special facility guidelines, and how it is cleaned, click here. Interested in other free pools? Click here.

Did you know that Edmonton has the second largest metropolitan park in all of North America? It’s second only to the famous Central Park in New York City. Conveniently, a river runs straight through ours, and the Riverboat Queen is accepting passengers 6 and under for free this summer! Enjoy the cost-effective boat ride or a free bike-ride in the park!

Want more hot tips??? Edmonton is known as “The Festival City,” for good reason. While attending the theme parks can be quite expensive, Edmonton also plays host to many festivals and parades accompanying these events – which can be free to watch! Most notably, and hosting their 35th anniversary starting on July 5th, the Edmonton Street Performer’s Festival is certainly one of the most beloved festivals in Edmonton! Featuring approximately 1,500 performers and having a long tradition of accommodating free shows for infants/toddlers, how could it not be? Note that tips to the performers are encouraged, but in no way expected. More information can be found here.

Don’t forget Edmonton’s parades! Many of these parades stretch for long distances throughout the city – the most notable being the K-Days parade! Set to happen on July 19th, your family will surely enjoy the musical theme this year as they set the stage by partnering with Alberta Music! Your children are sure to love all the charismatic performers and talented musicians. Mark this one in your calendar – click here.

Raising late-night owls rather than sun-loving salamanders? Check this one out! Perhaps a lesser known program because it just started, but still a super value – Edmonton offers the “Kids Bowl Free” program. Located at the Bonnie Doon Bowling Lanes and Gateway Entertainment Centres, find all of the info here. Please note that sign-up is required.

Or perhaps your little one is more of an “intellectual”. My family seems to be raising a grown up rather than a child – last Wednesday, he shook his soccer coach’s hand rather than giving him a high-five (I suppose that’s better than what his brother tried to do, which was head-butt him). If a sophisticated aura appears to be wafting off of your child too, have I got news for you! The beautiful Art Gallery of Alberta is offering free admission on Thursday evenings between 5 and 8 pm! Children are always free at this majestic museum but on Thursdays, consider yourself a child too! You’ll certainly feel like one after you get in for free and start discovering the secrets of King Tutankhamun or exploring your fascination with dinosaurs. It’s sure to be a treat so check them out here!

Anything else spark your or your children’s fancy? Leave a note for other families to check out! Hope to see you at KARA and cheers to a wonderful summer!

Easter Traditions

I’m a mom to two cunning and adventurous boys, aged almost four and two, and even though I’ve been in the parent role for almost four years, I feel like I’m still fairly new to the family tradition-starting game. I don’t even want to get into my response to my toddler pointing out that Santa did indeed look a lot like Grandpa; I will forever remember not having a clever response to his shocking observation. Therefore, for Easter, I wanted to be on my game, so I asked around my mom-circle of friends for some crafty new-age and old-family Easter traditions. Here were a few egg-tastic ideas I came across!


Growing Your Own Egg Grass

Many families, including mine, put together big baskets of goodies and toys for their children. It’s a real treat to follow the trail of Easter eggs to the treasure basket at the end, right? Well for this tradition, instead of using that plastic grass or green paper shreddings for the bottom, it’s a neat idea to grow the grass yourself ahead of time – with your kids! My family purchased wheatgrass from the farmer’s market and are currently taking turns watering it until the big day. I explained to my boys that the Easter Bunny needs to have a place to leave his gifts to us, so we need to grow some grass for him to hide our presents. They really like helping me take care of it; it gives them some responsibility and excites them quite a bit. It’s also cheaper than the plastic grass and will go nicely in our smoothies afterwards. Plus, it won’t end up all over my floor or in the landfill.


Planting Magic Beans

This was the cutest tradition I’d ever heard of and I can’t wait to do it with my family! The evening before the Easter Bunny arrives, my family and I will be planting jellybeans in our garden. Yes, that is correct! We will be digging holes in the soil, putting candy jellybeans inside, burying and watering them. The next morning (with a little help from Mom), the jellybeans will have sprouted into large, muti-coloured lollipops (or peeps on sticks, I haven’t decided yet)! This will be the sweetest tradition because any lollipop-shaped treats are my children’s favourite candy and I know I will be catching amazing memories on camera!


Visiting a Farm

One of my mom friends told me she takes her kids to a farm once or twice around the Easter holidays. This really makes me think of spring because you’re bound to see bounding lambs, chirping chicks, and porky piglets. I think this is a great idea for a spring outing and is sure to teach young ones about outdoor farm activities. If you’re interested in making this a tradition, I recommend Prairie Gardens just north of Edmonton. They are opening a little later this year than normal (May 1st) but they always have great farm activities, including a petting zoo, and festivals (click here)!


Easter Scavenger Hunts – In the Dark

Lots of families do the chocolate and toy scavenger hunts, even personalized ones or ones with riddles and clues! I love the idea of all of them as my parents also did these for us while growing up, but have you ever heard of an Easter egg scavenger hunt at night!? When my tots are a little older, I will certainly be bringing the fun with this game! What you do is get the plastic Easter egg containers, the chocolate eggs or toys, and glow-in-the-dark bracelets – crack the bracelets, add them and the chocolate to the Easter egg containers, turn off all the lights and hide them. I’m certain no child will forget this cool and spooky Easter tradition (beware of terri-fried little chickens)!


Rainbow Brunch

Again, many people probably recall the lovely family brunch they grew accustomed to on Easter morning, cracking open and enjoying numerous coloured eggs (after handfuls of chocolate I’m sure). But a few Mom friends of mine have brought the Easter egg coloured breakfast one step further – rainbow pancakes! Just separate your favourite pancake batter into different bowls and add food colouring. Watch the happy faces enjoy their rainbow stack of pancakes with their favorite juice (which you can also add colour to)!


Egg Carton Picnic

This one is also really cute – instead of using plates for our Easter picnic at the park, we will be eating out of egg cartons! And I have so many cartons saved up already, it won’t be hard at all. Cut up some cheese, broccoli, carrots celery, nuts, raisins (all of the Easter Bunny’s favourites of course) and add them to their own egg compartment for a portable lunch outdoors! Of course, one of the egg compartments will have chocolate eggs; I’m not a total Momster.


Remnants of the Easter Bunny

Lastly, try this one out if you enjoy a goofy way to end the holiday (it’s a total Dad joke but hilarious; I’m a comedi-hen myself). Take those jellybeans you planted in the garden (since no one wants to eat them now) and put them in the toilet bowl. Add a sign from the Easter Bunny to the inside of the toilet lid that reads, “Easter Bunny was here – Sorry I forgot to flush!”

If your kids are old enough to read, they’ll either love it or be disgusted – if this joke is a bad egg, don’t blame me, I only laid the table!


Add Your Easter Story

If you have Easter traditions you’d like to share, please feel free to leave a comment or story! I know we’re all funny-side-up yolkers here!

Risky Play

Have you ever found yourself enjoying a nice cup of tea and watching the morning news in peace when suddenly a pint-sized person jumps from the arm of the couch into your unsuspecting face?

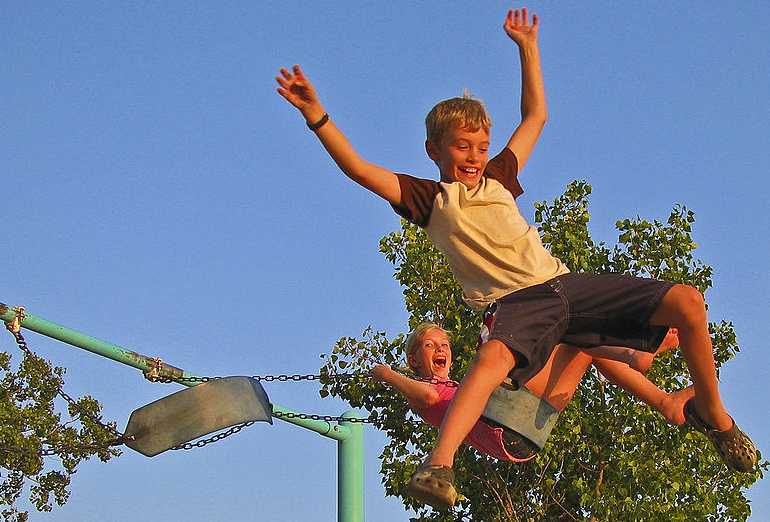
Children love risky play, especially my children. They are constantly looking for ways to increase the thrill of the game, even if it means sacrificing safety. The purpose (other than to give me a heart attack) is to increase the fun and explore the rules of their environment.


A Learning Technique

Risky play is a learning technique – what I mean by this is that when children are engaging in risky play, they are conducting a science experiment (without knowing it). They are using reasoning and chance, as scary as it is, to determine what they are comfortable with, and what their bodies and environment will allow.


Benefits of Risk

Risk management skills, along with self-confidence, resilience, and reducing the chance of injury, are all learnings a child gains from engaging in risky play.

I know what you are about to ask; how can risky play reduce the chance of injury? The science tells us that those children who engage is risky play have a much greater understanding of what is likely to cause injury. A child that has continually experimented with tree climbing knows the best routes to take, which trees are safe to climb, and how to go back the way they came.

If you had never climbed a tree as a small child and then are asked to climb one as an adult, your body, being longer and stronger, would allow you to climb to the top without difficulty. But now you’re in a pickle because you’re at the top of a tree and don’t know how to get down. A child can only climb as high as his or her body and environment allows, not to the top. They take small steps as they mature, pushing themselves just as much as is allowable.


A Young Life Without Risk

Risky play certainly seems dangerous and it can result in injury, so why hasn’t natural selection weeded it out?

Experiments have been done on rats to deprive them of risky play and the outcome was less than appealing. The researchers did not deprive them of other types of socializing, just risky play, and they found that the rats grew up emotionally crippled. When faced with the unknown, instead of showing curiosity and adaptability like their risky play counterparts, the emotionally crippled rats would seize up in fear or lash out with aggression (click here). Not a rat-ical way to grow up.

On the flipside, the science has shown that risky play has quite the evolutionary advantage. I’m sure everyone can recall their puppy or kitten play wrestling with them or another animal. Perhaps to wolf cubs, this is practice for later squabbles over meals. Monkeys will leap for branches that are just within reach, pushing themselves further and further each time. This experience will certainly come in handy when leaping away from challengers. Certainly one of the most perilous types of risky play can be seen in mountain goats (kids) that frolic on incredibly steep, rocky slopes. Undoubtedly this will make them hard prey to catch. All animals engage in risky play and it benefits them tremendously.

Freedom + Fear = Thrill (Danger)

So now that we are all aware that risky play is a benefitting activity to engage in, should we just let our youngsters have at it – absolutely not. There are still real dangers in hazardous play (which often accompanies risky play), so parents have to be vigilant in identifying and removing the hazards.

Risk – The possibility of something happening

Hazard – A potential source of danger

Hazards are often beyond a child’s ability to recognize. Risks are uncertainties that a child often recognizes and challenges (click here).

Back to our lovely tree example, the child sees a challenge and is uncertain about what will happen if they climb to a certain branch. What the child does not recognize is that the branch they’ve chosen to climb to has rotted out – a hazard the parent needs to control. Removing the hazard can be done by removing the branch, or, even better, teaching the child how to recognize rotted branches. By controlling the hazards, the child is still able to engage in risky play without an increase in the chance of injury.

Risk now equals hazards divided by parental safeguards.


Risky Play in Your Community

I love the tree examples I’ve shared with you but when I look around the current area where I’ve chosen to raise my family, not many trees pop out to say “climb me.”

Living in a city rather than countryside can seem a little challenging when it comes to engaging in risky play, but it’s important to note that risky play hotspots can be found anywhere! Your local park, your backyard, your living room – anywhere! When it was too cold and slippery outside for hazardless risky play, my family and I set up an obstacle course throughout the house. My preschooler would run and jump from chair to chair and my toddler would bound into piles of pillows. When we play in the backyard, my kids love to use the short beam surrounding my yard to perfect their gymnastic skills. The chance of a small drop to the grassy lawn below certainly livens up the game! And local parks encourage plenty of risky play activities with its monkey bars, twisty slides, and swings. All you have to do to be a vigilant parent in these scenarios is to remove debris, check for the correct signage for safety standards, and be a helping hand when your child needs it!

To find out more on how Canada is improving your child’s access to independent and unstructured outdoor play, click here.


Last Note on Inspiring Yourself

“Security is mostly a superstition. Life is either a daring adventure or nothing.” — Helen Keller


Please feel free to leave a comment or story about the risks you and your child take together!

Sports for Kids

Coming out of the winter coma are the bright and fresh faces that perk up in the new light of spring! If your kids are like mine, just coming to terms that Mom was right, that the world really does have seasons, you would also laugh at their astonished faces as you push them into the year’s first muddy puddle!

And now that my spring babies are another year older, what does it mean for new activities this year? Of course I had this planned since they started walking – sports!

Every parent loves watching their child grow and master new skills. For preschoolers playing sports, these skills can include better coordination, increased stamina, healthier lungs and hearts, stress reduction and improved sportsmanship. For the family as a whole, it promotes bonding and healthy living! A home run for everyone!

What’s Holding You Back?

For our family, sports can be a huge undertaking. They can be pretty expensive as they usually require gear in addition to registration fees. They are usually held on weeknights, which can be exhausting. Plus, there are so many kinds to choose from – a hurdle on its own! But these red flags shouldn’t hold you back! After all, raising children is a lot like building a recreation centre. The first five years can be likened to laying the foundation, the most crucial part as it sets the pretense for the rest of the structure. A strong foundation with core morals and values will enable your child to grow into a beautiful building, I mean person.

And sports have the power to help build that strong foundation because they teach leadership, trust, patience, discipline, respect, and sportsmanship!


Just Do It

The Frontrunners of Funding

There are a few organizations out there that can help low income families pay registration fees and/or provide funding for equipment. One of these programs is called KidSport, a local non-profit whose mission is to allow any kid to benefit from sports and to remove the financial barrier that could be preventing them. To check out their website, click here.

Likewise, Canadian Tire’s Jumpstart program is very similar. The criteria to qualify are similar and they are happy to help families fill out application forms. Find them here.

Also, your local YMCA has funding options for low income families and they host a huge variety of programs! For qualification, check them out here.

Lastly, this hidden gem is not so hidden. AllSports Replay is a used sports store where you can buy and sell secondhand sports gear! This is a great way to save a buck and also give your old sports equipment a new home. Find them here.


Out of Left Field

As for knowing which sports your child is ready for… Were you or have you ever been like me – new to the world of sports but wanted to drive that soccer-mom minivan with an air of expertise? I’m happy to say I’ve now lived through an entire season of kids in sports and know a thing or two! Check out these sports and their corresponding benefits!

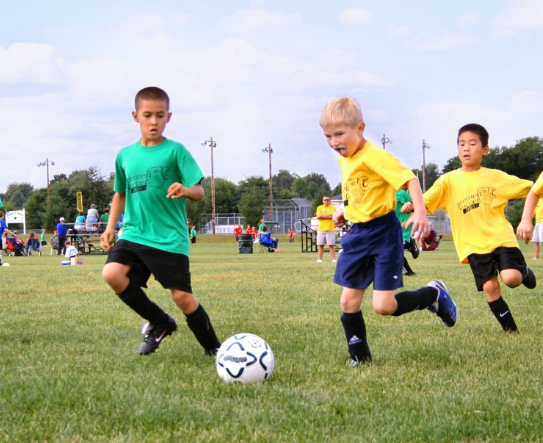
Soccer – One of the more popular sports for kids. It’s easy to learn, with young stars starting out at the tender age of two, and one of the more reasonably priced ones (I recently paid $115 per child for the spring season and no gear was required). Soccer is fast-paced, adrenaline pumping, and promotes teamwork and discipline. As children age, they will also have the benefit of learning to control and juggle the ball, improving coordination and flexibility (click here).

Badminton – Racket ball sports like badminton have additional benefits because they encompass a large variety of athletic movements, including running, lunging, swerving, and diving. Small children can easily hold and handle small badminton rackets and learn to handle the birdie with practice and patience. When older, sports like badminton encourage kids to become nimble and strategize their moves. To learn from the experts on gear and game, click here.

Swimming – A must-learn survival skill and wonderful pastime, swimming is a sport that is learned through competition with no one but the water. Once learned, swimming will never be forgotten, and strangely enough, no one is a newbie as swimming is actually learned in the womb. My babies and I did Mommy muscle toning swim classes together when they were only four months old! Classes were $75 and only required swim diapers! See here.

Lacrosse – Another sport that is knocking it out of the park is lacrosse! A great starter game for hockey enthusiastic parents that cherish their children’s front teeth, lacrosse is a strategic game that requires dexterity and quick-footedness. Starting at four years, my older son has just come out of his first season of lacrosse and has learned quite a bit about teamwork. The season wasn’t too expensive ($120 for three months) but the gear was quite pricey. Still, if you dream of cheering on your little star, check out the specs on proper hockey helmets as I believe this is the most important part of this sport (here).

Bicycling – This is one sport I love to do with my kids and it is terrific for cardiovascular exercise! It promotes balance, coordination, and love for the outdoors! You can pick up fairly inexpensive balance bikes or training wheel bikes at Sportchek ($60) or buy secondhand, or likewise, baby ride-along seats that fit on your bicycle ($100)! For the experts in bicycle and helmet reviews for kids, check out two wheeling tots here!


Child Too Young for Sports?

Is your child too young to pass a ball but you’re itching to get back into the active world of sports? Were you previously an active person and find it hard to get back into the swing of things after being dubbed the parent title? I recall a time when I could go running or swimming any time I wanted – Now I have to get creative!

The jogging stroller – try picking up one of these! They can run fairly prices but if you have Kijiji at your fingertips, you can usually score a good deal as many parents love them and they usually last through more than one child. Likewise, Once Upon a Child usually has discounted secondhand ones that you can testdrive in the store. Jogging strollers are very useful and maneuverable. They double as a mode of transportation and as running equipment (especially if you find one with snow runners). Plus, running is a free sport!

If running isn’t your thing and you crave the atmosphere of the gym or class, check out the City of Edmonton’s Kids Dens located in these rec centres: Clareview, The Meadows, Commonwealth, Terwillegar, and Kinsmen. They have childminding staff that will watch your little one while you work on your bod for one to two hours. If you’re interested, click here.


The Ball is in Your Court

Now that you have the knowledge, it’s time to get active! Remember, building a strong foundation with your child now will help them out in years to come! They need a strong foundation to rely on for their entire lives – let sports help you impart knowledge and values to your kids now – you won’t regret the effort!

Indoor Crafts

Snowy Days and Indoor Crafts

As the weather turns, it’s difficult to keep our kids active and inspired. Rather than turning to the same old toys and television, I urge parents to try some indoor crafts! And, there’s no better time like the present because there’s another fun holiday around the corner, and terribly low temperatures leading up to it. Knowing this, my sons and I have been working extra hard on decorating our home with DIY Valentine’s Day crafts!

Craft Making – The Importance of it

Craft making is inspirational!  Not only does it help young ones develop fine-motor skills and give them that boost of self-esteem (sometimes I wonder if my kids really need it), it also helps promote innovation, creativity, problem-solving skills, and socializing! Recently, researches in this area have found a connection between the skills developed during arts and crafts time and success in later years of life. They concurred that toddlers and preschoolers develop what are called visual-processing skills when they create a crafty project. Visual-processing skills incorporate our ability to recognize patterns, find sequences in patterns, and identify spacial patterns. In simpler terms, if you have a blue triangle and you’re trying to fit it into a yellow, circular hole, you will be able to recognize that it doesn’t fit before even trying it. These same skills are what mathematics, geometry, and reading rely heavily on. Researchers also found that children who have regular arts and crafts time also have greater memory skills, muscle memory, and planned behavior. These skills are indicative of professional leadership skills (click here).

Woohoo! Now let’s bust out some romantic crafts! I’ve divvied up these crafty ideas based on age for ease of perusing.

Newborn to One Year Old

A Salty Keepsake

You can never have too many cutie-pie feet or handprint décor in your house, so try making this one with your squirmy baby (it’s easier to use and cleaner than paint!). You will need:

1 cup of salt

2 cups of flour

¾ cups of water

5 drops of red food colouring (more if you desire red rather than pink)

1 large mixing bowl

1 mixing spoon

1 rolling pin

1 well-rested baby

Stir the salt and flour together in the mixing bowl. Gradually mix in the water until you have a nice, doughy consistency. Knead in the red food colouring until you have the desired colour and then roll the dough as if you were about to cut it into cookies (but don’t because they won’t taste very good!).

Using your baby’s feet or hands, make a print in the dough. I liked making heart shapes with their feet and then cutting a heart shape around it. I also made a small hole at the top so that I could lace a string through to hang it up.

After your unique baby creations are created, place the salty memories in the oven at 180 °C for about 10 minutes (times vary depending on the size and thickness of creations).

Note: You can also paint and varnish your creations if you desire to make your own homemade toys!

One to Two Years Old

A Sticky Situation

If you’re like me and allow your children as much free rein as possible with arts and crafts (within reason), you’ll want to have a go at this one! What you’ll need:

1 piece of paper (I prefer cardstock as it will allow for a lot of glue without getting soggy)

1 bottle of glue or glue stick

Approximately 30 pieces of coloured paper, roughly 1 x 1 inches in size

1 black marker

1 adventurous toddler

I drew a large heart on a white piece of cardstock with a black marker, added a bunch of glue to the inside of the perimeter, and provided my son with little pieces of coloured paper so that he could decorate as he saw fit. It worked very well – the third time.

Haha! I mean to say he had fun each and every time he tried it but he mastered new skills along the way, making his third attempt worthy of carefully scraping it off the highchair to hang on the wall.

Two to Three Years Old

Fashionista in the Making

Kids at this age love to play dress-up, so why not fashion your own trinkets? If you can get your hands on these, or similar items, try making this DIY Valentine’s Day crown and necklace:

6 pieces of pipe cleaner, red or pink

1 piece of white cardstock (lengthy enough to fit the circumference of your child’s head)

20 to 30 foam or paper hearts

1 pair of children’s scissors (or a holepunch, if available)

1 pencil

Tape or stapler

1 apprentice jeweler

First, measure your child’s head using the cardstock paper. Mark it with a pencil (don’t cut it while it’s near your child for risk of injury or a nasty haircut). Cut and tape it. Let your child decorate it with the hearts and pipe cleaner.

I liked showing my son how to wrap pipe cleaner around his finger to give it a spirally appearance. We then put hearts on them and taped them to either side of the crown to appear as ears.

For the necklace, holepunch or cut holes in the centres of the remaining hearts and let your child poke the other pipe cleaner pieces through them. Twist the pipe cleaner ends together so that they will make a lovely, romantic necklace with heart shaped jewels!

Three to Four Years Old

A Basket of Roses

My son is obsessed with bringing me flowers ever since he was allowed to pick them in my Mom’s garden this summer (she told me he was more accomplished at demolishing her flowers than the neighbourhood rabbits). This year, we made some DIY roses in a freshly decorated Chinese noodle box. They smell excellent.

What you need:

1 Chinese noodle box (or tissue box cut in half width-wise)

18 to 20 coloured mini (or regular sized) cupcake liners

6 green pipe cleaners

1 small floracraft (or styrofoam)

2 sheets of red tissue paper

Tape

1 amateur florist

Help your child turn the cupcake liners inside out so that the coloured portion will end up being the inside of the roses. Stack three liners on top of one another and poke the pipe cleaner through the centre of the stack, so that it is just poking through, and twist slightly so that is remains in place. Do this for all six of the flowers.

For the basket, tape the tissue paper to the outside to give it a beautiful glow. Place the floracraft inside the box and cover with more tissue paper. Then poke your pipe cleaner flowers into the floracraft. Viola! A beautiful centerpiece your guests are sure to comment on!

Four to Five Years Old

A Watercolour World of Hearts

For the most hardened of young artists, there is black paint and watercolours. This project takes a little prep work from parents as it requires a day for the glue to dry before your young creator can get to work, but it’s well worth the wait! What you need:

1 piece of cardstock paper

1 bottle of white glue

1 tablespoon of black paint

1 tray of watercolours

1 glass of water

1 paintbrush

1 pair of child’s scissors

1 aspiring artist

Empty one half of the glue out of the bottle and add the black paint (the bottle should contain ½ white glue, ¼ black paint, and ¼ air), and mix well. Next, draw hearts onto the cardstock paper and let dry for one day. My son seemed to like when the hearts had many sections in them as it gave him more areas to paint with different colours.

After the black glue is dry, let your child watercolour away! The watercolour paint doesn’t take nearly as long to dry (about half an hour). After we cut ours out, we taped them to his bedroom window so that it had a stained glass effect!

Shopping List and Other Indoor Craft Ideas

I do hope you and your family have fun trying these artsy ideas! All of the materials were available at the dollar store, except for the floracraft, which was obtained from Michaels, and the Chinese noodle box, which was left over from lunch. They were all relatively well priced (even the lunch!) and many colour options were available.

If you’d like more DIY craft ideas, I strongly suggest attending KARA’s Creative Play & More program, which is a free, drop-in program. KARA staff will surely astound you with the many crafty ideas they possess. Please come join us for an artsy day this week!